
Overview
Can’t believe I wrote this in December 2020 and forgot to publish.. Well, here you go!
In the previous post, I talked about the new resource model in Oracle cloud for Exadata. In this post, we will see how to create a new Exadata instance in Oracle cloud using the new resource model.
Creating a new Exadata instance involves creation of the following main components:
- Exadata Infrastructure
- VM Cluster
- Database
- If not already created, a VCN, a primary and a backup subnet (You cannot use the same subnet as primary and backup)
Create New Exadata Infrastructure:
Once you login to Oracle Cloud interface, follow the below steps:
- Expand the left-hand side hamburger menu and click on “Bare Metal, VM, and Exadata”.
- Under “Exadata at Oracle Cloud”, click on “Exadata Infrastructure”.
- Now click on “Create Exadata Infrastructure”.
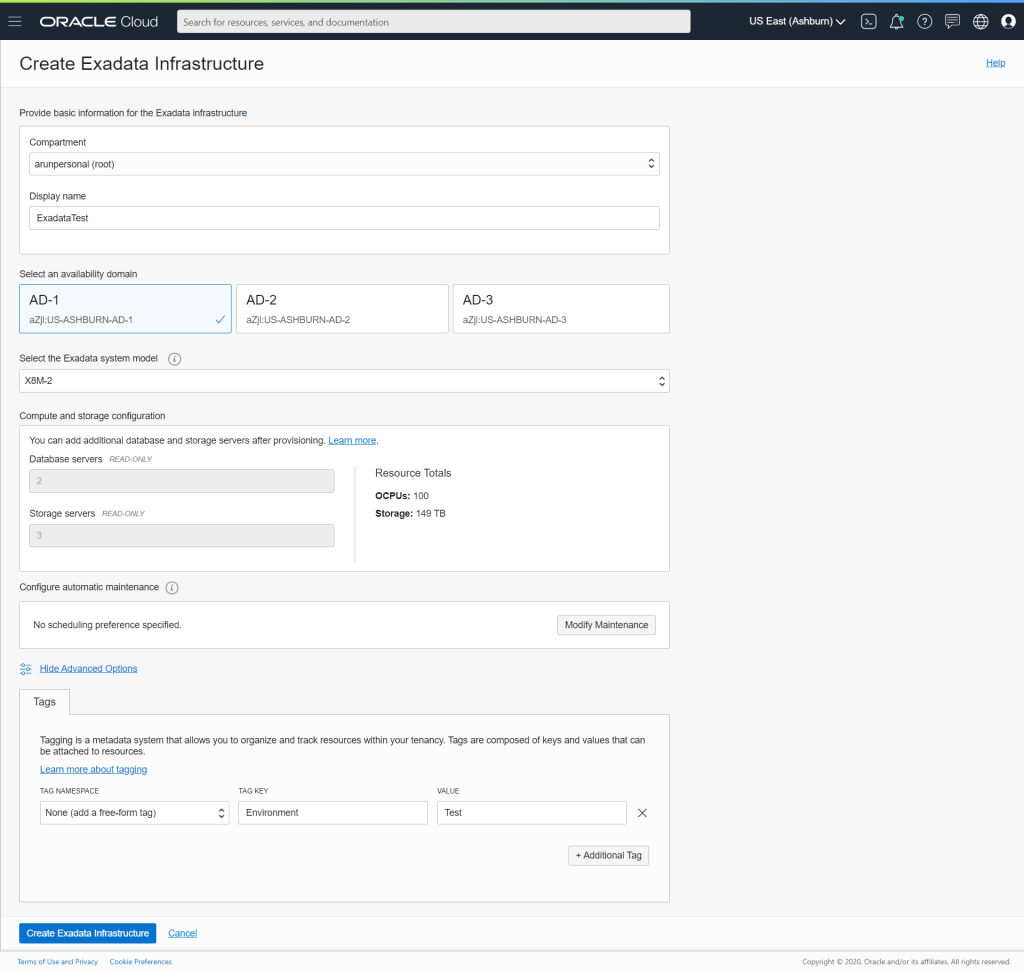
- On the resultant screen, choose the compartment in which the new Exadata infrastructure is going to reside and provide a display name.
- Choose an availability domain.
- Now, choose the Exadata System model. The available choices are: X8M-2, X8-2, X7-2 and Exadata Base.
- The only option available for X8M-2 is a quarter-rack (Max 100 OCPUs) with 2 database servers and 3 storage servers. X8-2, X7-2 however lets you choose between a quarter (100/92 OCPUs), half (200/184 OCPUs) or, full (400/368 OCPUs) rack.
- You can also choose to define a custom maintenance schedule however, it can be configured later as well so, I am going to skip it for now.
- Click on “Show Advanced Options” and tag the new resource appropriately.
- Now click on “Create Exadata Infrastructure”. Within a few seconds the new resource will be ready and we can now move on to the creation of new VM Cluster.
Create VM Cluster
You can only create one VM Cluster per Exadata infrastructure.
- Click on the newly created “Exadata infrastructure” and click on on “Create Exadata VM Cluster”.
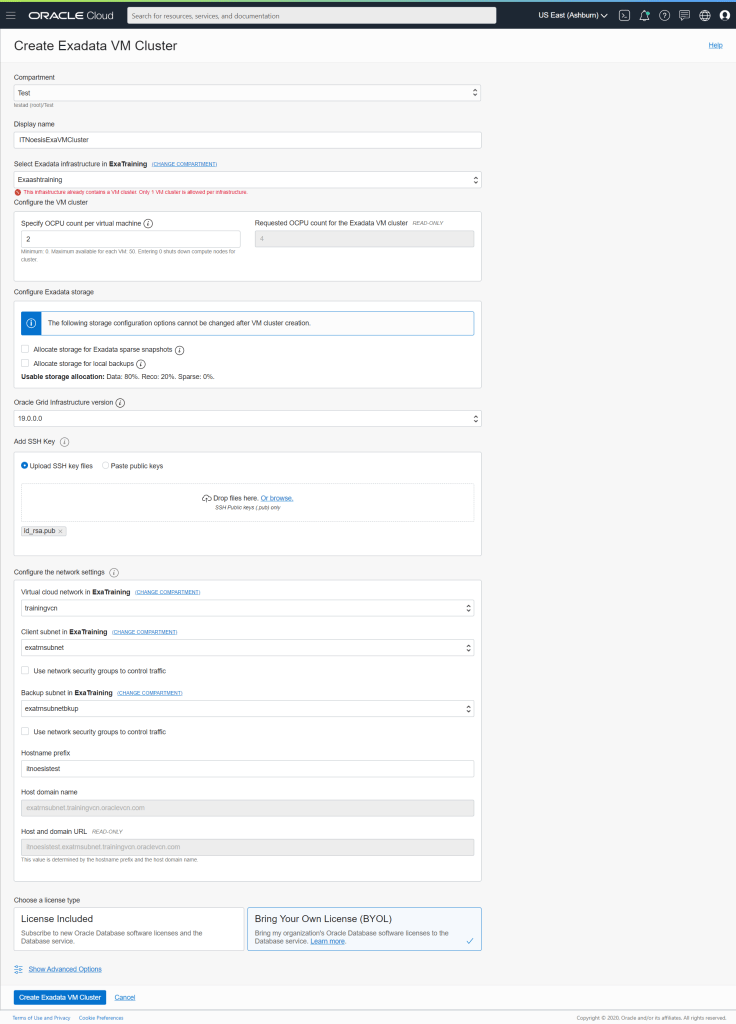
- Now, choose the compartment in which the VM cluster is going to reside.
- Provide a display name and select the Exadata infrastructure to which this VM cluster is going to belong.
- The number of OCPUs per virtual machine can be configured in the next field. The number of required OCPU for the cluster will automatically be updated based on the value you specify.
- Ensure that you choose the next option to allocate storage for sparse snapshots and local backups as these options can not be changed later.
- Choose the GRID infrastructure version and then either upload or, paste your public ssh keys. These would be required to access and manage he VM cluster later.
- Choose the already created VCN, primary and backup subnets.
- Provide a hostname prefix and choose the licensing option between “License included” and “BYOL”.
- Click on “Show Advanced Options” and tag the new resource appropriately.
- Now click on “Create Exadata VM Cluster”.
- It is time to grab yourself a coffee and lunch and maybe a quick nap as this is going to take some time. For me, it took around 4 hours.
- Once the VM cluster shows as available, we can move on to the next step of creating a database.
Create Database
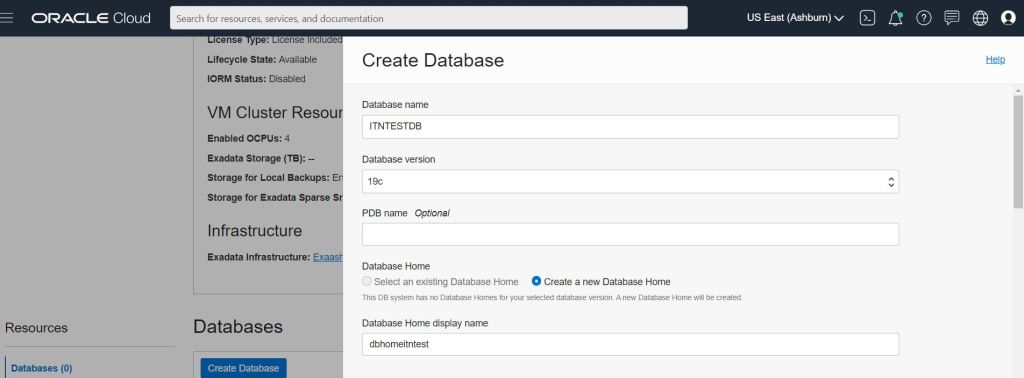
- Click on the newly created Exadata VM Cluster and then click on “Create Database”.
- Provide a name of the database and choose the database version.
- In the next field, you can either choose to create a new database home (only option for a new VM cluster) or, an existing home.
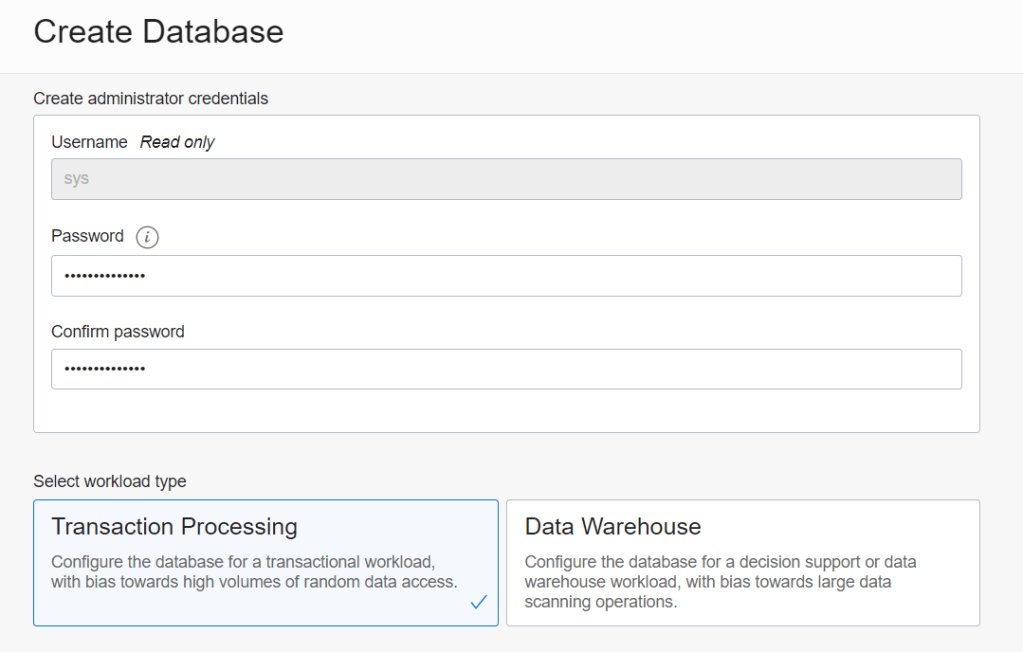
- Provide a strong password in the next field. The same password will be used for sys, system and PDB admin accounts.
- Based on the type of database, select between “transaction processing” and “Data warehouse”.
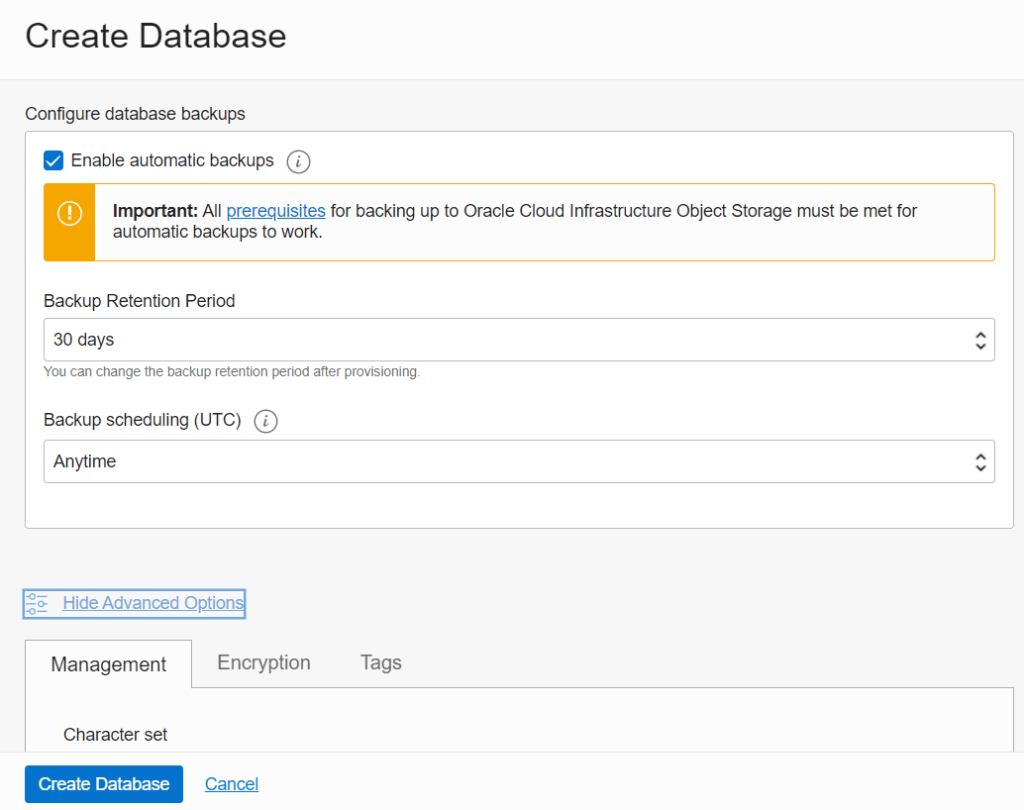
- Define an automatic backup schedule.
- Click on “Show Advanced Options” to choose the desired character set for the database, encryption options and tag the new resource appropriately.
- Now, click on “Create Database”.
Connecting to Exadata instance and database/s
Once you have successfully created Exadata and the database, login to OCI and navigate to Oracle Database –> Exadata at Oracle Cloud.

Now, navigate to the compartment in which you have created the Exadata instance, go to “Exadata VM Clusters” and click on the name of the Exadata Vm cluster you just created. It will display the details of the VM cluster.
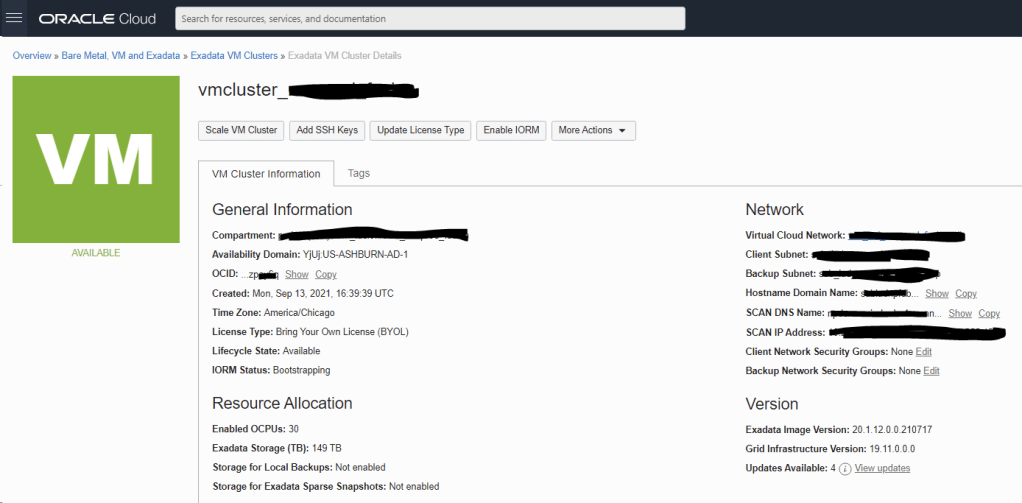
Now, use the scan listener name and connect to the database like you would connect to your on-premise database. You can also access the O.S. of the database nodes using the private IP address or, DNS names.
Summary
In this post, we talked about creating a new Exadata instance in Oracle cloud as a service. There is much more to do after an Exadata and a database is created and I will talk about them in my upcoming posts. Stay tuned!
Discover more from IT-Noesis
Subscribe to get the latest posts sent to your email.
