
Setup a new Linux virtual machine on Microsoft Azure
In the previous post, we learned how to build a windows virtual machine on Microsoft Azure. Now, let us build a Linux virtual machine using CentOS.
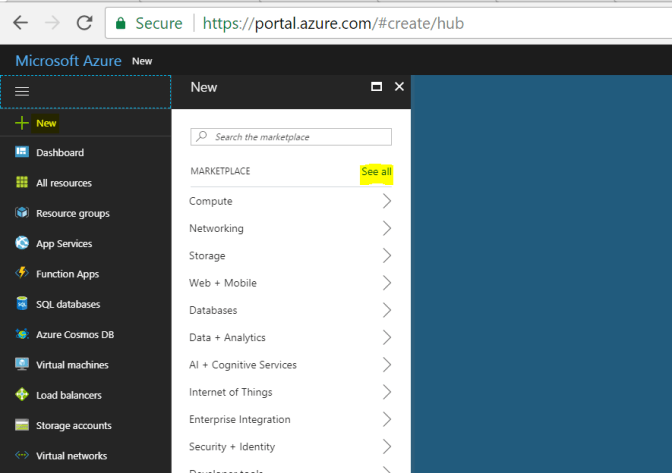
Let us open Microsoft Azure portal.
On the left side panel, click on “New”. This will open the marketplace in a new blade, click on “See All” or, type “CentOS in the search box and hit “Enter”.
This will present a list of all CentOS distributions available at Azure marketplace. Let us click on CentOS-based 7.3. Let us leave the deployment model as default which is “Resource Manager” and click on “Create”.

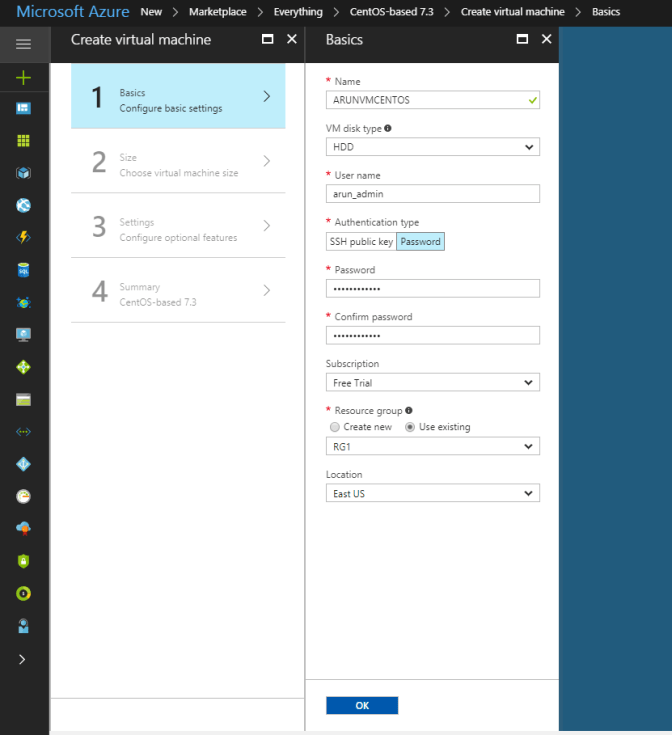
You will now be presented with the configuration blade. Below is the list of configurable options.
- Name: The name of a VM can only have 1-15 characters and cannot be just numerical or, contain non-ASCII or special characters.
- VM disk type: There are 2 options available
- SSD: SSDs are premium disks which provides higher performance and should be used for IO intensive and production workloads.
- HDD: HDDs are based on magnetic drives and provide slower performance as compared to SSD.
let us select HDD.
- User name: A user name to access your VM. Again, it can also have 1-15 characters only and cannot start with a capital letter.
- Authentication Type: There are 2 options available
- SSH Key: SSH keys provides a more secure way to authenticate and access your Linux virtual machines on MS Azure. The public key is stored on the Linux VM and private key is the one which you have to provide when you login to the system. The private key should be protected and must not be shared. You can generate SSH keys using ssh-keygen on Linux and OS X or, using PuTTYGen on windows.
- Password: A strong password, this must contain 12-123 characters.
Let us choose the password authentication for now and will discuss on a later stage on how to change the authentication mode from password to SSH keys.
- Confirm Password: The value should be same as the Password field.
- Subscription: The type of subscription you have. Since we are running a free trial, we will only have one option available.
- Resource Group: This provides a way to easily manage and administer your resources. The resource group name can only include alphanumeric characters, periods, underscores, hyphens and parenthesis and cannot end in a period. Let us choose the existing resource group “RG1” for this deployment.
- Location: you can see a list of 26 regions here. If you have a special subscription for education etc., you will be able to see all 34-regions. Let us choose “East US”.
Once all the values are provided, click on “OK”.
Now, let us select a size for the virtual machine, click on “View All”.
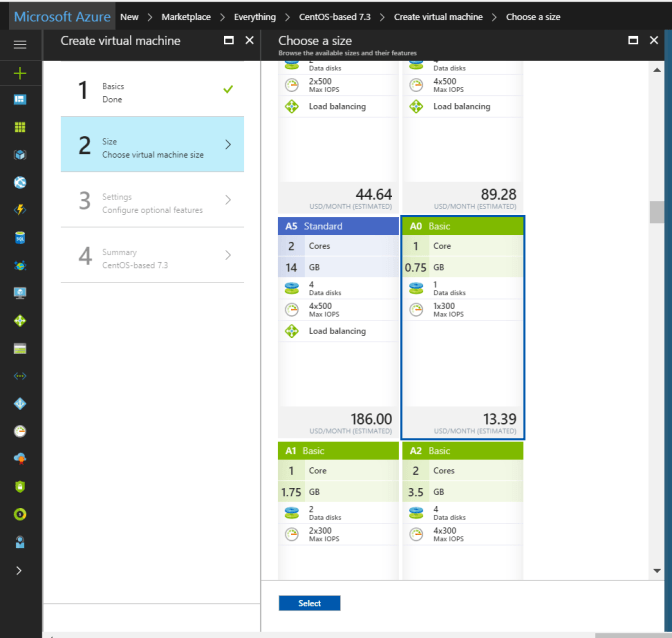
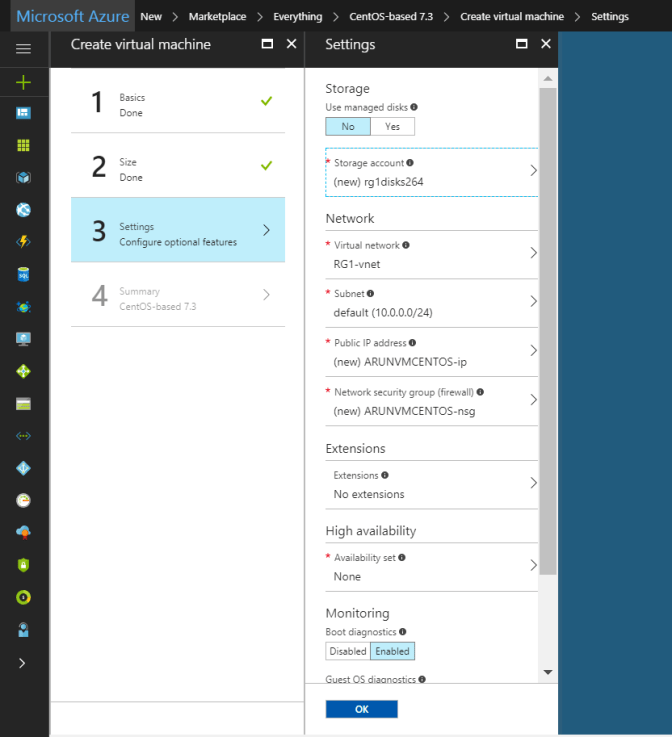
This provides a list of available sizes, let us choose “A0 Basic” for now and click on “Select”. On the “Configure options features” blade, you can either choose to have managed disks or, configure your own storage account. There are many benefits associated with managed disks such as, it allows you to create thousands of disks simultaneously in minutes, provides Industry-leading durability and availability by simultaneously replicating your data to three different replicas, offers you more security with granular access control however, having a storage accounts gives us a unique namespace to store and access our storage objects. For this illustration, we will go with our own storage account. Let us leave all the options unchanged and click on “OK”.
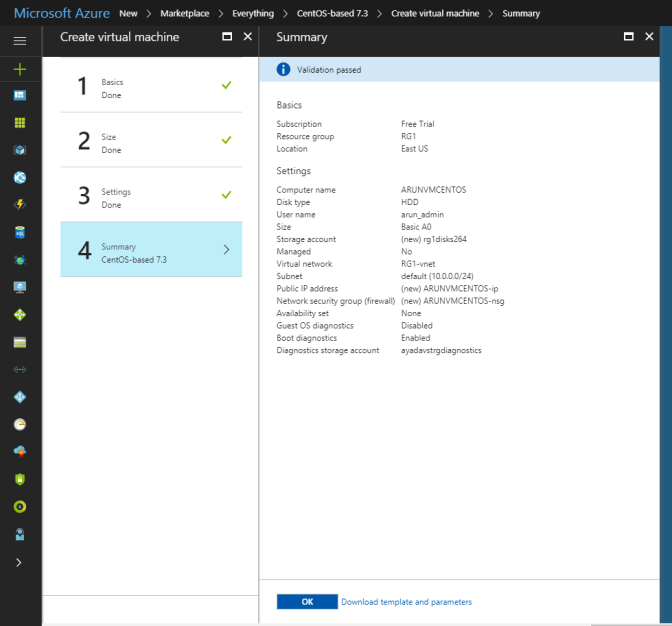
On the Summary page, review all the information and click on OK.
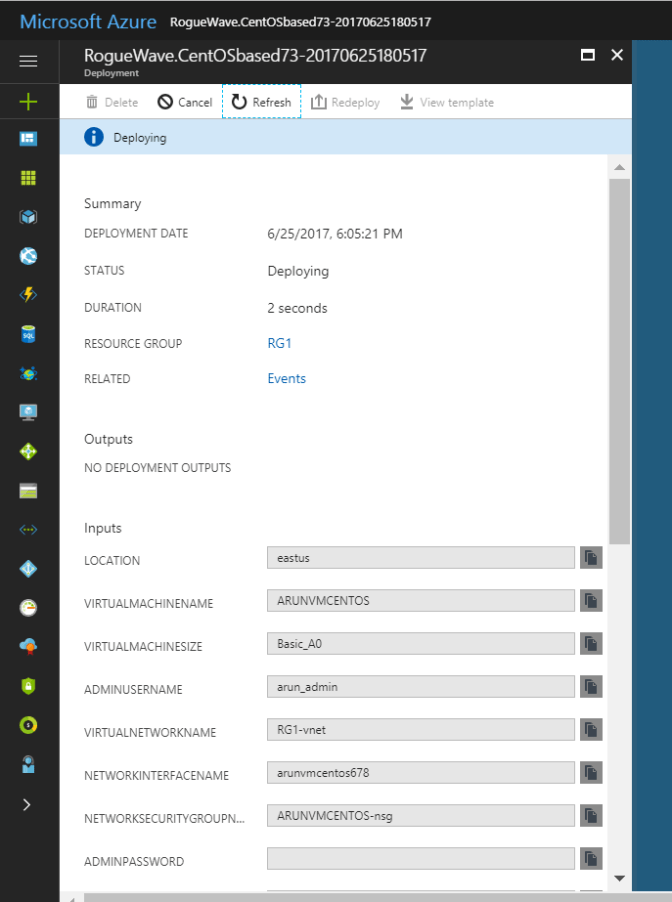
Now, you will be re-directed to the dashboard. You can see the status of the new VM being built here.

Click on the dashboard item to view the detailed status of the virtual machine deployment.
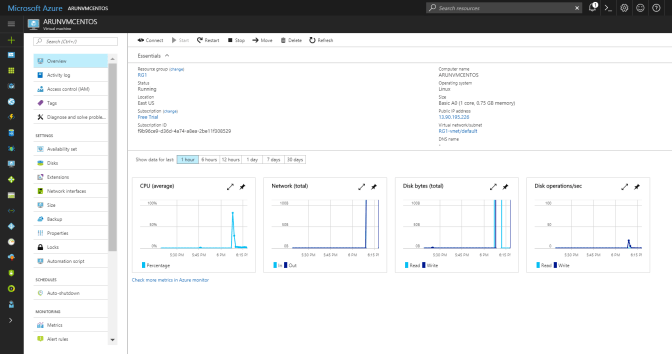
Once the VM is deployed, you will be re-directed to the overview page where you can view the status of the VM, connect to it, stop, restart, move to another subscription, move to another resource group and even delete it.
Congratulations! You have successfully built a new Linux virtual machine on Microsoft Azure. Now, let us try to connect to the machine.
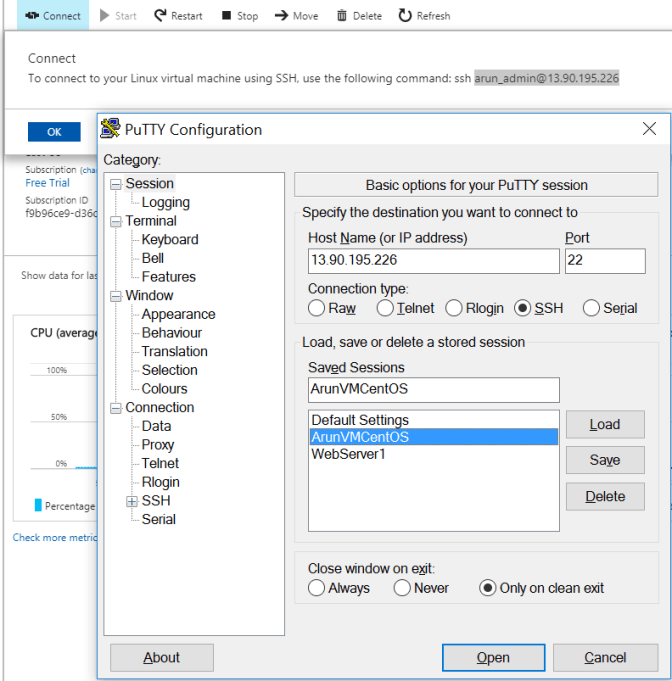
Click on the “Connect” button and you will be provided the public IP address of the machine. Since this is a Linux operating system, if not already, you will have to download a ssh client such as Putty.
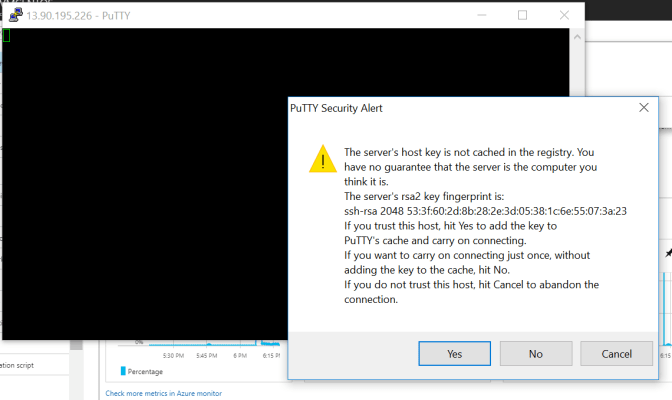
Once downloaded, let us run Putty.exe, copy the public IP address of the Linux virtual machine and paste it in the space provided under “Host Name (or IP Address). You can also give a name to the connection and click on “Save” in order to connect to the machine later without remembering the IP Address. Now, click on “Open”.
You will be prompted to cache the ssh key in putty, since we trust this virtual machine, let us click on Yes.
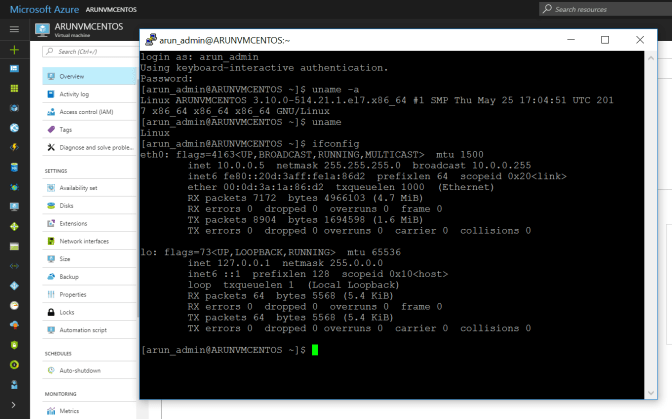
Once connected, provide the admin username which was created during the deployment and supply the password. You should be able to connect to the virtual machine now.
What should you do next?
Perform basic administration on MS Azure
Other recommended articles:
Getting started with Amazon Web Services
Getting started with MS Azure
Getting started with Google cloud
Setup a new Windows virtual machine on Microsoft Azure
Discover more from IT-Noesis
Subscribe to get the latest posts sent to your email.

One thought on “Setup a new Linux virtual machine on Microsoft Azure”