
Overview
In this third and last post of the three-part blog series on accelerating Weblogic Cluster deployment in OCI using marketplace UCM image, we will go through the deployment and addition of the second node of the WebLogic cluster.
Part 1: Deployment of first-node of the WebLogic cluster
Part 2: Configure Weblogic Domain
Part 3: Deployment and addition of the second node of the Weblogic Cluster
Create the second node from a boot volume clone of the first node
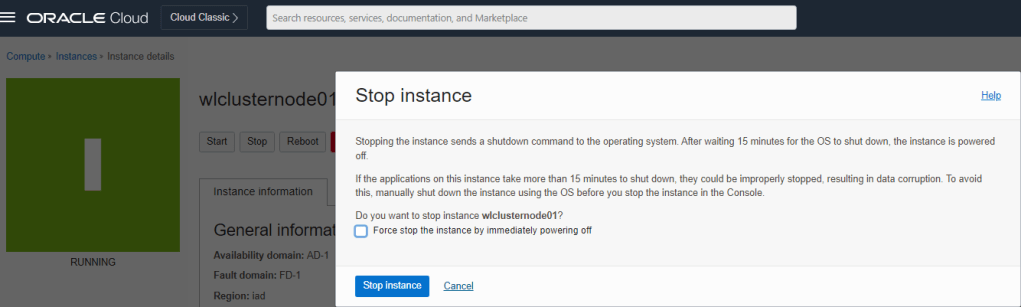
Before the boot volume can be cloned, we need to bring the VM down. Let us perform a graceful shutdown first, though.
[oracle@wlclusternode01 security]$ export WLS_DOMAIN_HOME=/u01/app/oracle/middleware/user_projects/domains/wlcluster_domain
[oracle@wlclusternode01 bin]$ cd $WLS_DOMAIN_HOME/bin
[oracle@wlclusternode01 bin]$ ./stopNodeManager.sh
[oracle@wlclusternode01 bin]$ ./stopManagedWebLogic.sh ManagedServer_1
Stopping Weblogic Server...
[oracle@wlclusternode01 bin]$ ./stopWebLogic.sh
Stopping Weblogic Server...
Once the Weblogic services are down, bring the instance down from the cloud console.
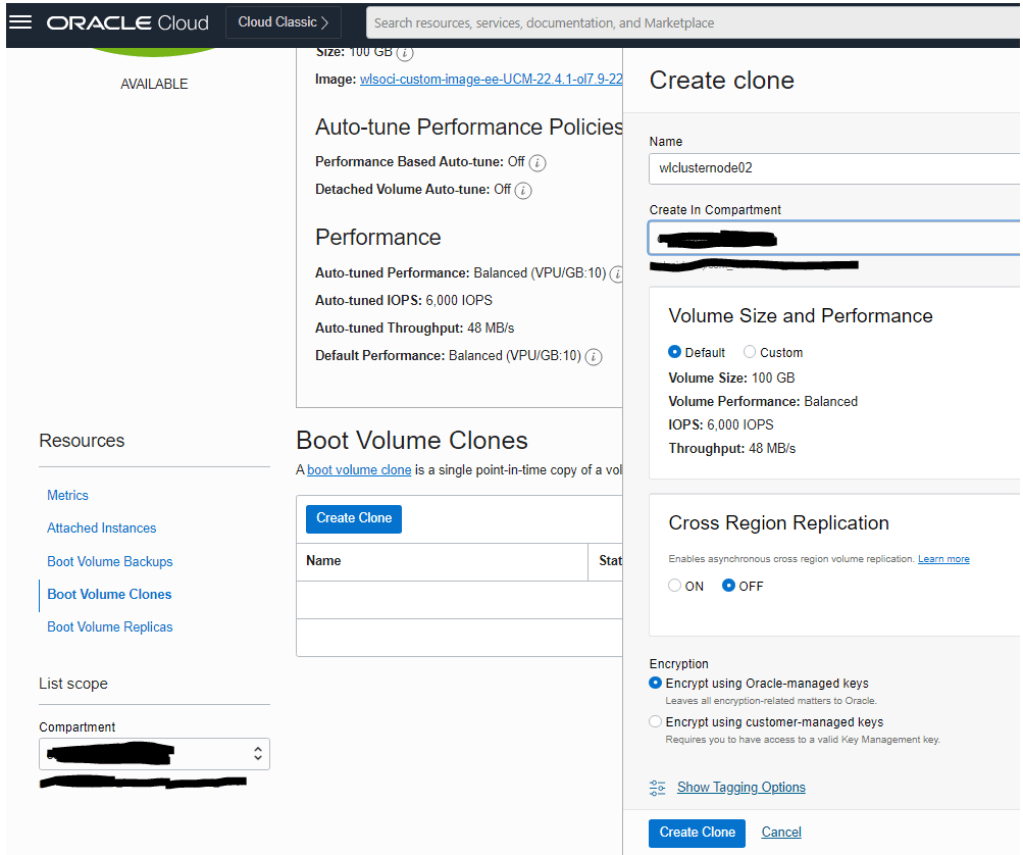
Once the VM is shutdown, scroll down to Resource and click on “Boot Volume” to see the attached boot volume and click on its name to see more details.

On the Boot Volume details page, click on “Boot Volume Clones” and “Create Clone”. Let us name this clone “wlclusternode02”.
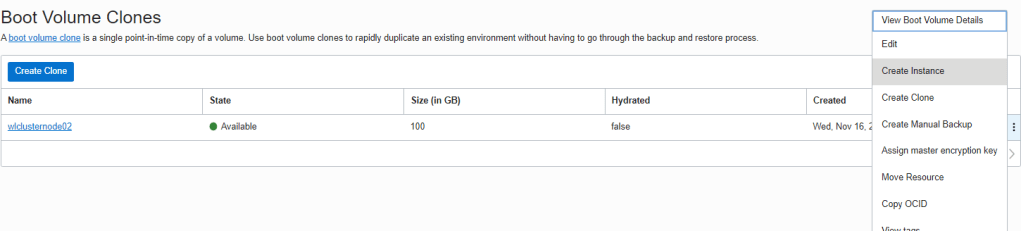
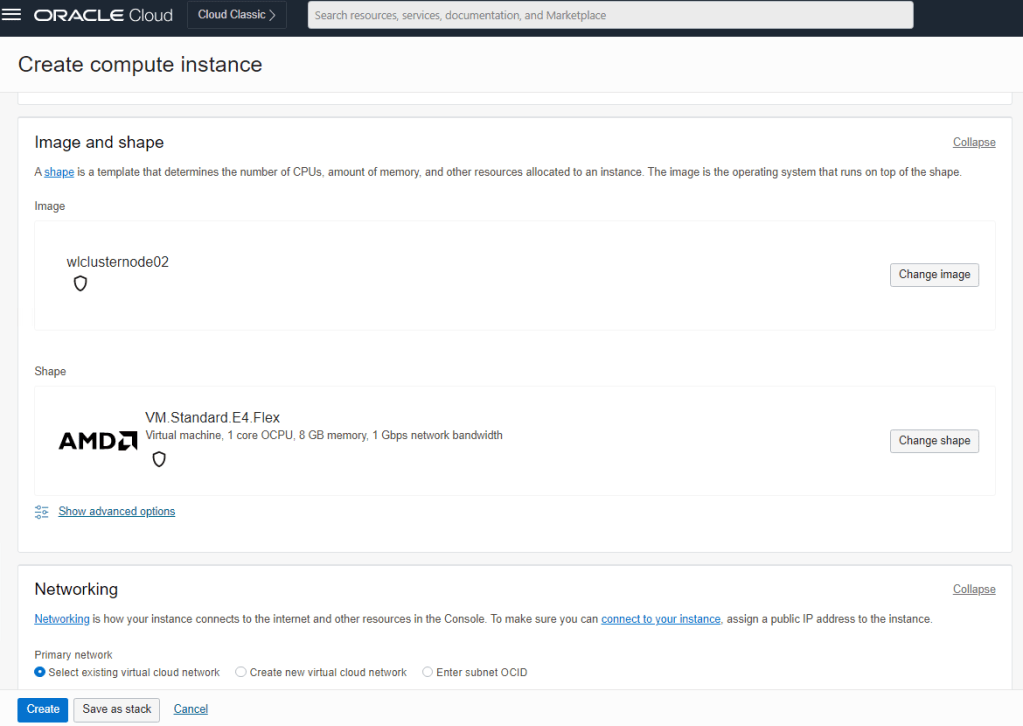
Once the clone becomes available, click on the three-dots on the right-hand side and click on “Create Instance”.
On the instance creation page, give a meaningful name to the node for example, wlclusternode02, keep the availability domain same however choose a different fault domain than node-01.
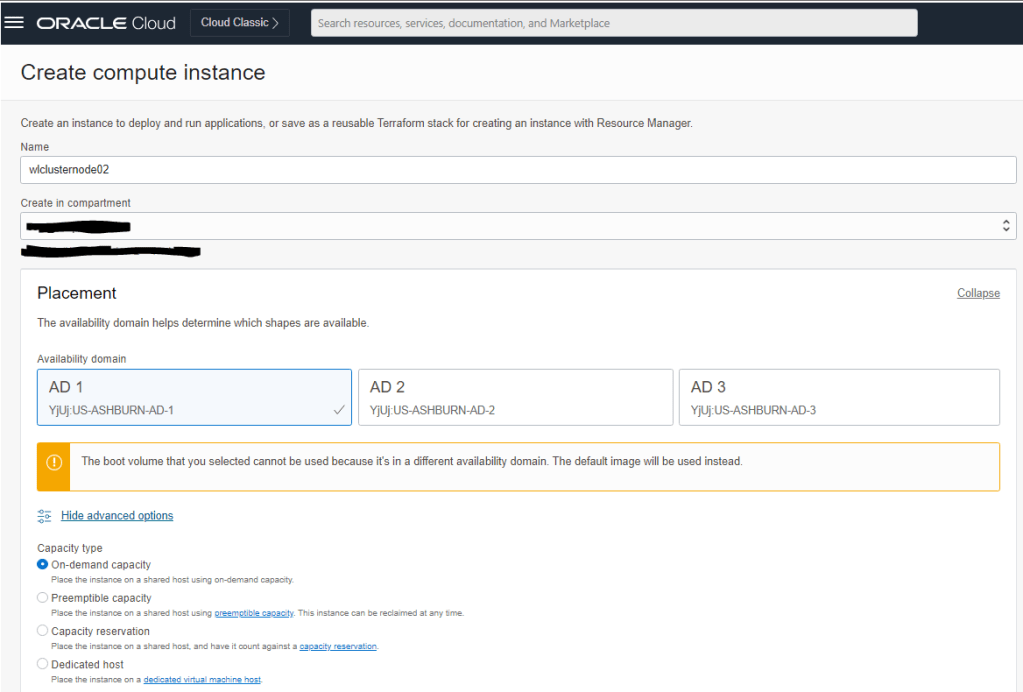
Upload the ssh keys, update any advanced management options and click on “Create”.
While node-02 is getting provisioned, let us start node-01 as well.
Prepare node-02 and add it to the Weblogic cluster
Start Weblogic Admin server and Node manager on node-01.
[oracle@wlclusternode01 ~]$ export WLS_DOMAIN_HOME=/u01/app/oracle/middleware/user_projects/domains/wlcluster_domain
[oracle@wlclusternode01 ~]$ cd $WLS_DOMAIN_HOME/bin
[oracle@wlclusternode01 bin]$ nohup ./startWebLogic.sh > adminserver.log &
[oracle@wlclusternode01 bin]$ nohup ./startNodeManager.sh > NodeManager.log &
Login (ssh) to the second node and navigate to the $WLS_DOMAIN_HOME directory. Update “Listen IP Address” in the nodemanager.properties file with the internal IP Address of node-02.
[oracle@wlclusternode02 ~]$ export WLS_DOMAIN_HOME=/u01/app/oracle/middleware/user_projects/domains/wlcluster_domain
[oracle@wlclusternode02 wlcluster_domain]$ cd $WLS_DOMAIN_HOME/nodemanager
[oracle@wlclusternode02 nodemanager]$ ls -lrt
total 16
-rw-r-----. 1 oracle oracle  170 Nov 15 22:15 nodemanager.domains
-rw-r-----. 1 oracle oracle  894 Nov 16 16:14 nodemanager.properties
-rw-r-----. 1 oracle oracle  720 Nov 16 19:59 stopnodemanager.log
-rw-r-----. 1 oracle oracle 2142 Nov 16 19:59 nodemanager.log
[oracle@wlclusternode02 nodemanager]$ vi nodemanager.properties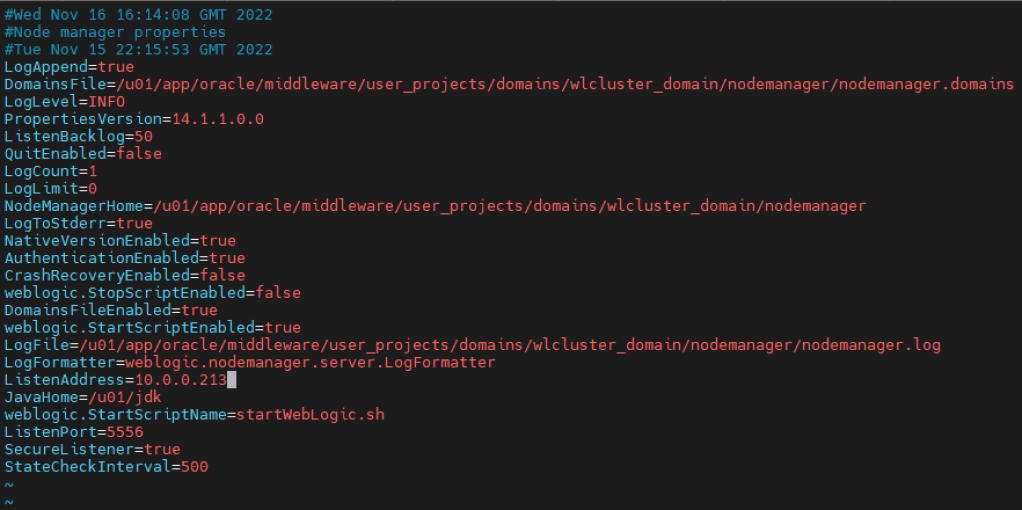
Now add port 5556 in local firewall and update nodemanageron node-02 as well.
[oracle@wlclusternode02 nodemanager]$ logout
[opc@wlclusternode02 ~]$ sudo firewall-cmd --permanent --zone=public --add-port=5556/tcp
success
[opc@wlclusternode02 ~]$ sudo firewall-cmd --reload
success
[opc@wlclusternode02 ~]$ sudo su - oracle
Last login: Wed Nov 16 20:32:40 GMT 2022 on pts/0
[oracle@wlclusternode02 ~]$ export WLS_DOMAIN_HOME=/u01/app/oracle/middleware/user_projects/domains/wlcluster_domain
[oracle@wlclusternode02 ~]$ cd $WLS_DOMAIN_HOME/bin
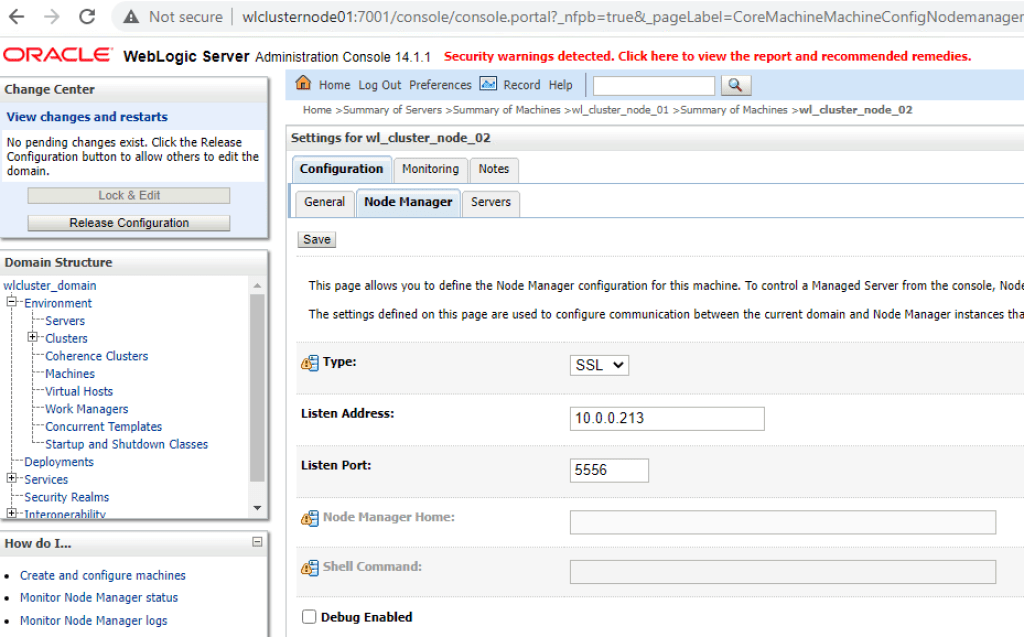
[oracle@wlclusternode02 bin]$ nohup ./startNodeManager.sh > NodeManager2.log &Logon to Weblogic console and navigate to Environment –> Machines –> wl_cluster_node_02 and update the Listen address to the internal IP address of node-02.
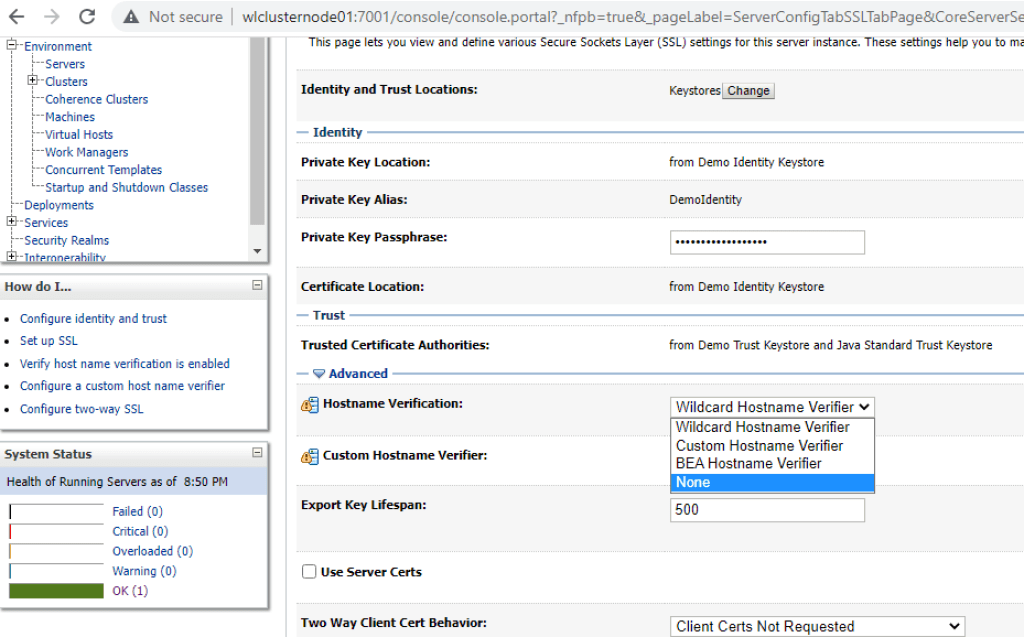
Disable hostname verification of all the managed servers so that they do not fail because of the autogenerated Weblogic certificate tied to node-01.
Disable HostNameVerification for NodeManager as well by adding “-Dweblogic.nodemanager.sslHostNameVerificationEnabled=false” to JAVA_OPTIONS in startNodeManager.sh file.
[oracle@wlclusternode02 ~]$ cd $WLS_DOMAIN_HOME/bin
[oracle@wlclusternode02 bin]$ vi startNodeManager.sh
[oracle@wlclusternode02 bin]$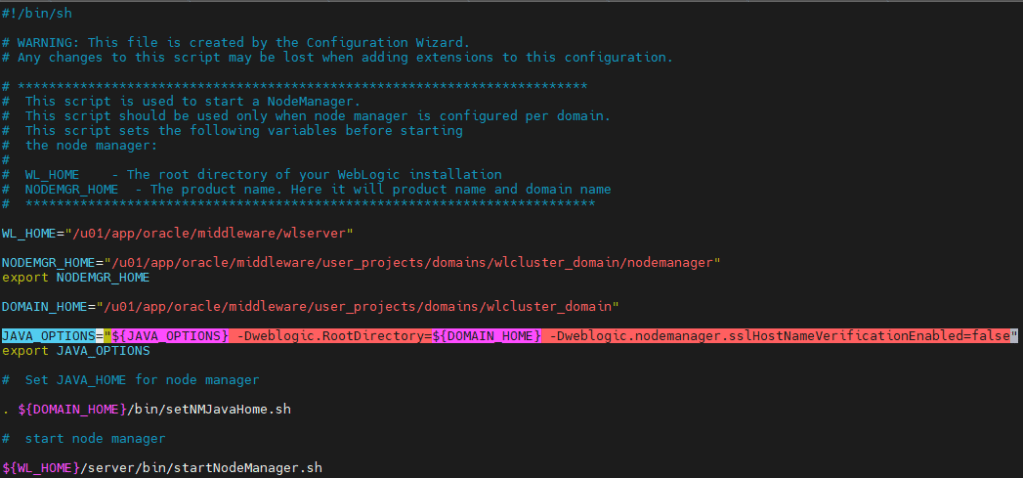
Now, let us perform a restart of Admin server and node managers.
On node-02,
[oracle@wlclusternode02 ~]$ cd $WLS_DOMAIN_HOME/bin
[oracle@wlclusternode02 bin]$ ./stopNodeManager.sh
On node-01,
[oracle@wlclusternode01 ~]$ cd $WLS_DOMAIN_HOME/bin
[oracle@wlclusternode01 bin]$ ./stopNodeManager.sh
[oracle@wlclusternode01 bin]$ ./stopWebLogic.sh
Stopping Weblogic Server...
[oracle@wlclusternode01 bin]$ nohup ./startWebLogic.sh > adminserver.log &
On node-02,
[oracle@wlclusternode02 bin]$ nohup ./startNodeManager.sh > NodeManager2.log &Once this is done, you should be able to start the managed servers from Weblogic Console. Now, the Weblogic cluster is ready to be used.
Discover more from IT-Noesis
Subscribe to get the latest posts sent to your email.

2 thoughts on “Accelerate Weblogic Cluster Deployment in OCI Using Marketplace Image - Part 3”